How thick ice needs to be to fish safely in New Hampshire
The thrill of ice fishing in New Hampshire is undeniable – the crisp air, the camaraderie, and the chance to pull a lunker through a hole in the ice. But that excitement can quickly turn to dread if you're not absolutely sure about the stability beneath your feet. The biggest concern for any ice angler isn't just catching fish, it's making it home safely. This guide will walk you through exactly how thick the ice needs to be for a safe and enjoyable outing, and equip you with the knowledge to make smart, safe decisions on New Hampshire's frozen waters.
Why Ice Thickness Matters for Your New Hampshire Ice Fishing Adventure
It's easy to look out across a seemingly endless expanse of white and assume the ice is uniformly safe. But the reality is far more complex, and underestimating the dynamic nature of frozen water can have serious consequences. We're not just talking about a minor inconvenience; a lapse in judgment on the ice can quickly become a life-threatening situation.
The Hidden Dangers Beyond Just Falling Through
When people think about ice safety, the immediate fear is often just breaking through. And while that's a very real and terrifying possibility, the dangers extend far beyond a simple dip in the freezing water. Imagine being far from shore, perhaps near a current or an area with thinner ice, and suddenly hearing a loud crack. The ice might not give way completely, but a significant fracture can leave you stranded on a precarious floe, cut off from safety. The panic and uncertainty in such a scenario are immense, even if you never fully enter the water.
Then there’s the sheer physical toll if you do go through. New Hampshire's winter waters are brutally cold, often just above freezing. Cold water shock can incapacitate you almost instantly, leading to involuntary gasping, hyperventilation, and disorientation. Even if you manage to avoid immediate shock, hypothermia sets in rapidly, robbing your body of its core temperature and muscle control, making self-rescue incredibly difficult. Getting trapped under the ice, especially if there's a current or slush layer, is another grim possibility that many seasoned ice anglers constantly consider.
Furthermore, ice fishing often involves considerable gear: augers, sleds, shanties, coolers, and sometimes even snowmobiles or ATVs. All this equipment represents a significant investment, both financially and emotionally. Losing a prized power auger to a weak spot in the ice, or worse, having a snowmobile plunge through, would be a devastating experience that extends beyond personal safety to significant material loss. Always check the ice religiously, especially when bringing anything heavier than your own two feet.
Factors That Turn "Safe" Ice Into a Trap
The biggest misconception about ice is its uniformity. Just because you measured eight inches near the shore doesn't mean it's eight inches a hundred yards out, or even ten feet away. Many elements conspire to create wildly varying ice conditions on the same body of water. For example, springs bubbling up from the lakebed introduce warmer water that constantly erodes the underside of the ice, creating hidden thin spots that are impossible to detect from above. Similarly, river inlets and outlets on a lake, or narrow choke points in a river, often have strong currents that prevent ice from forming properly or continually wear it away from below.
Snow cover, while seemingly benign, is a major factor in ice quality. A thick blanket of snow acts as an insulator, preventing new ice from forming and even causing existing ice to melt from the top down, creating treacherous slush layers beneath the snow. This slush can hide dangerously thin ice that might look solid from a distance. Air pockets trapped within the ice during its formation can also create "white ice" which, despite its thickness, is structurally much weaker than clear, black ice. It's like comparing solid concrete to aerated concrete – they both look like concrete, but one is far more robust.
Perhaps the most unpredictable factor is changing weather conditions. A week of consistent sub-freezing temperatures might build a solid base, but even a single warm, sunny day followed by rain can rapidly degrade ice quality. What was once strong, clear ice can quickly become "rotten" or "honeycombed" – a brittle, Swiss-cheese-like structure that has lost most of its integrity. This kind of ice might still appear thick, but it can collapse under surprisingly little weight. Staying informed about local weather patterns and understanding the specific characteristics of the water body you plan to fish, as outlined in the New Hampshire Ice Fishing Regulations by Water Body, is crucial for your safety.
Decoding the Numbers: How Thick Ice Needs to Be for Safe Ice Fishing in New Hampshire
When you’re venturing out onto a frozen lake, river, or pond in New Hampshire, you want more than just a gut feeling about the ice. You need concrete numbers, backed by expert advice, to make an informed decision about your safety. The New Hampshire Fish and Game Department provides general guidelines that are an excellent starting point, but always remember: these are minimums for ideal conditions.
General Guidelines from the Experts
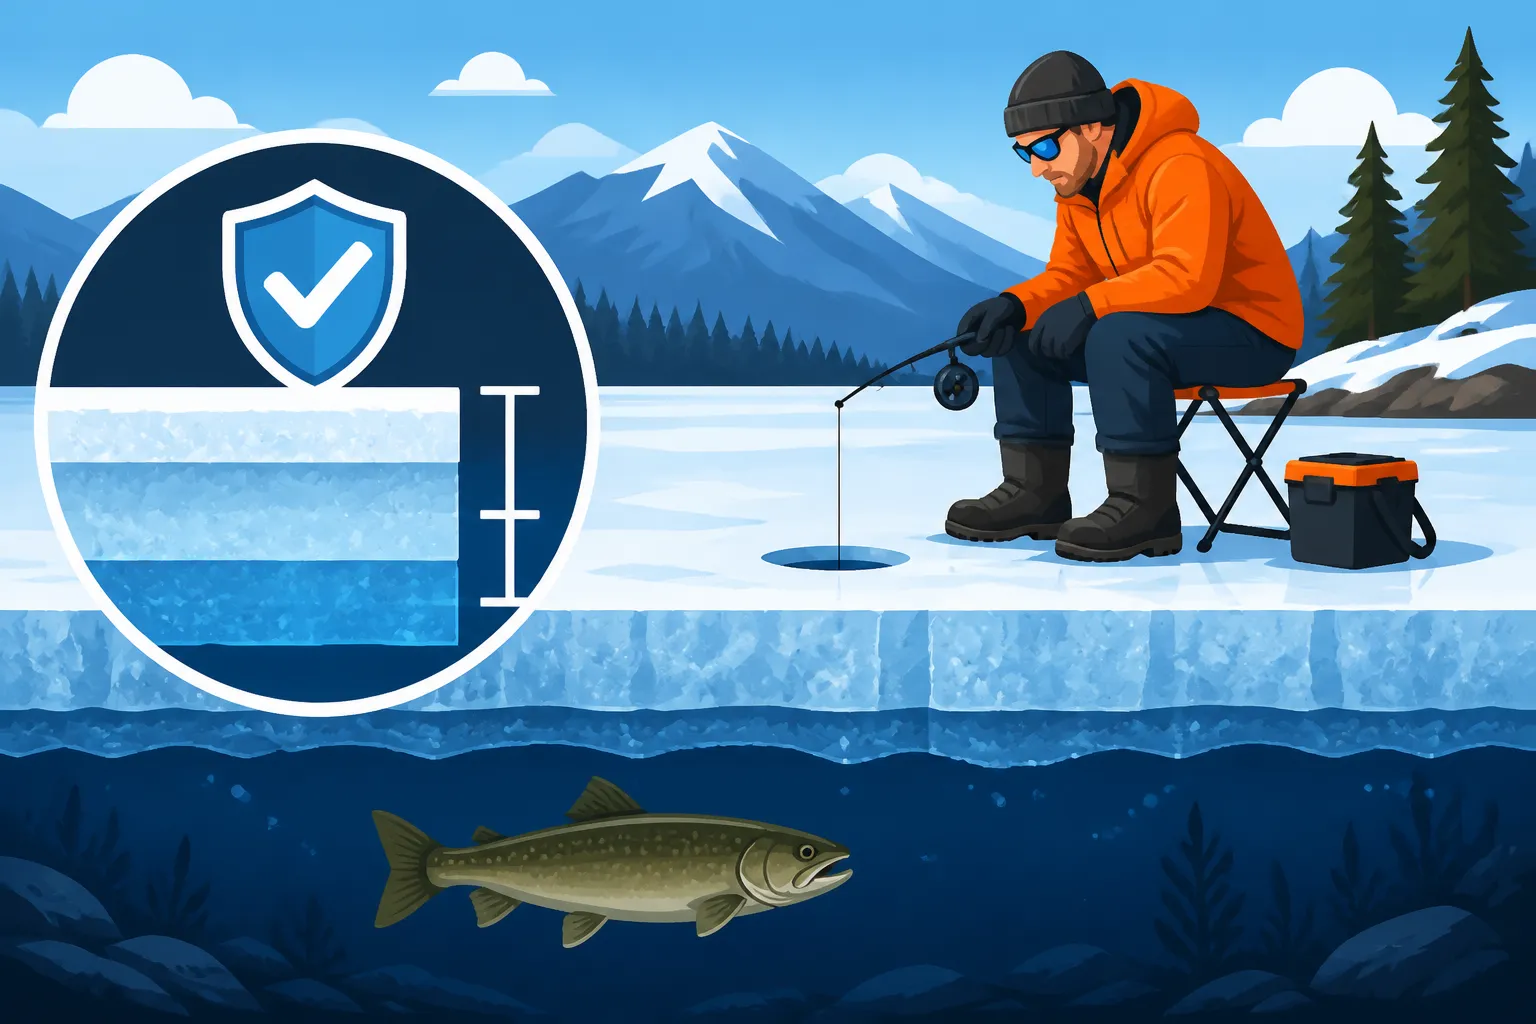
The most commonly cited rule of thumb for safe ice travel comes straight from our local experts: four inches of clear, solid ice is generally considered the minimum for a single person walking out onto the ice for fishing. This is often the first number you hear, and it's a good baseline. However, it’s absolutely critical to understand that this applies to clear, hard, newly formed ice and for a single person moving cautiously. It does not account for soft ice, white ice, or any additional weight from gear or companions. Think of it as the green light to start your adventure, not to sprint across the lake with all your gear.
Many people hear "four inches" and think they're good to go anywhere. This overconfidence is where danger truly begins. A single angler, moving deliberately and probing ahead, puts a very different stress on the ice than a group of anglers gathered in one spot, especially if they’re jumping around or drilling multiple holes close together. The dynamic stresses on ice from movement are much greater than static weight. Even if you're a lone wolf out on the hard water, constantly reassessing conditions as you move is non-negotiable.
Ultimately, these general guidelines serve as a critical starting point, not an absolute guarantee. They equip you with the foundational knowledge to begin your ice fishing journey, but the responsibility to measure, observe, and adapt rests squarely on your shoulders. For a broader overview of the sport, you might want to read our comprehensive guide on Ice Fishing in New Hampshire.
Specific Recommendations for Different Activities
As the amount of weight or the type of activity changes, so too does the minimum safe ice thickness. It's not a one-size-fits-all situation. Here's a breakdown of what the experts recommend for various ice fishing scenarios:
- For a single angler on foot, with minimal gear: At least 4 inches of clear, solid ice. This is your absolute minimum.
- For a small group of anglers on foot, or one angler with a lot of gear (e.g., a heavy sled, portable shanty): You should be looking for at least 6 inches of clear, solid ice. The combined weight and impact from multiple people and their equipment require a stronger foundation.
- For snowmobiles or ATVs: You'll need a significant increase in thickness, generally 8-12 inches of clear, solid ice. These vehicles exert dynamic pressure, and their weight can cause the ice to flex and potentially crack, especially at higher speeds. Always drive slowly and avoid congregating in one spot.
- For cars or light trucks: This is where things get truly risky. A minimum of 12-15 inches of clear, solid ice is recommended, but even then, extreme caution is advised. Many seasoned ice anglers will tell you it's simply not worth the risk. Vehicle weight is substantial, and if the ice gives way, rescue is incredibly complex and dangerous.
- For medium or heavy trucks: We’re talking 15 inches or more of clear, solid ice. At this point, you're venturing into territory where natural ice rarely achieves the necessary consistency and strength. Most experts strongly advise against driving anything heavier than a light truck onto natural ice.
It's crucial to understand the difference between static and dynamic weight. A parked car, while heavy, exerts static pressure. A moving snowmobile, however, creates dynamic forces that can propagate cracks far more easily. Always consider not just the weight, but how that weight is being applied to the ice. Furthermore, remember that these are thresholds for clear, hard ice. White ice, slush ice, or ice that has seen periods of thawing will require significantly greater thickness to achieve the same level of safety. Always err on the side of caution. If you're heading out to target species like pickerel or perch through the hard water, check out our guide on the New Hampshire ice fishing season for pickerel and perch for relevant dates and tips, but prioritize safety first.
Your Ice Safety Toolkit: How to Reliably Measure Ice Thickness
Knowing the recommended ice thickness is one thing; actually determining it accurately on the ice is another. You can't just guess or rely on what someone else said the ice was like yesterday. Conditions change rapidly, and your personal safety toolkit is your best defense against unpredictable ice.
Essential Tools of the Trade for Accurate Measurement
When you step onto the ice, your first action shouldn't be to walk out to your favorite fishing spot. It should be to probe and measure, systematically and thoroughly. For this, you'll need a few essential tools.
First and foremost is the spud bar. This is a heavy, chisel-ended steel bar that serves as your initial probe. As you walk, you strike the ice ahead of you with the spud bar. If the ice cracks easily or the bar goes through with little effort, you know you've found thin ice and need to retreat. It's a fantastic, low-tech way to test the ice without committing your full body weight. Many anglers consider it their most important safety tool, using it every few steps when venturing into unknown territory.
Once you've deemed an area safe enough to proceed, the next step is to create a hole for measurement. This is where an ice auger comes in. Whether you prefer a traditional manual hand auger or the speed and convenience of a power auger, these tools allow you to drill precise holes through the ice. Brands like Eskimo and Jiffy offer reliable augers that are widely available, including on platforms like Amazon. The key is that the auger allows you to penetrate the ice cleanly to get to the water below, providing a perfect cross-section for measurement. For recommendations on selecting the right one, check out our guide on the Best Ice Auger for New Hampshire Lakes.
Finally, you need a tape measure or a specialized measuring stick. After drilling a hole, simply drop your tape measure or stick down until it catches the bottom of the ice layer. Pull it up and note the reading. This might sound obvious, but eyeballing the thickness of ice through a hole is incredibly deceptive. Reflections, slush layers, and water in the hole can make thin ice look thicker than it is. A physical measurement is the only reliable way to know for sure. These three tools – spud bar, auger, and tape measure – form the cornerstone of any responsible ice angler's safety kit.
Understanding Your Readings and What Variations Mean
Measuring ice thickness isn't a one-and-done task; it's an ongoing process. You should be drilling test holes every 15 to 20 feet, especially when you're moving into unfamiliar areas, crossing pressure ridges, or heading out farther from shore. The goal is not just to find a single thick spot, but to establish a general understanding of the ice's consistency and identify any potential weak points. Think of it as mapping your safe route across the frozen landscape. If you're constantly finding good, solid numbers, you can proceed with confidence. If you encounter variations, it's a red flag.
When you take a measurement, ensure you're getting a true reading of the solid ice. Sometimes, you'll drill through a layer of slush or water on top of the main ice sheet. Make sure your tape measure goes all the way down to the solid ice beneath. If there are multiple layers of ice separated by water or slush, this indicates weaker, less stable ice than a single, uniform sheet of the same total thickness. These multi-layered conditions are often created by snow melting and refreezing, or by fluctuating water levels.
Perhaps even more important than the numerical thickness is the quality of the ice, which you can often discern by its color and texture. As you drill through, pay attention to what the core looks like. Clear, blue-black ice is the strongest; it forms slowly and contains minimal air. White or opaque ice, which is often riddled with air bubbles or frozen snow, is significantly weaker – sometimes only half as strong as clear ice of the same thickness. Grey ice indicates melting and water saturation, a sign of extreme weakness. Honeycombed or candle ice, often found in late season, is dangerously fragile. If your measurements show adequate thickness but the ice quality is poor, those inches are far less reassuring. Always prioritize strong, clear ice. For a more complete kit list, explore our guide to the Best Ice Fishing Gear for New Hampshire.
Beyond the Inches: Holistic Ice Safety Strategies in New Hampshire
While knowing the exact ice thickness is paramount, it's only one piece of the safety puzzle. A truly safe ice fishing experience in New Hampshire involves a multi-faceted approach, combining practical tools with smart decision-making and a healthy respect for the power of nature.
Reading the Ice: Color and Texture Clues
Developing an eye for ice color and texture is a skill every responsible ice angler cultivates over time. It’s about more than just numbers; it’s about understanding the ice's history and current state.
Clear, black ice is your gold standard. When ice forms slowly and consistently in calm, clear water, it appears dark because you can see through it to the water below. This ice is dense, strong, and provides the most reliable support. If you're measuring four inches of this type of ice, you can feel much more confident than if you measure eight inches of another type. It's a testament to the cold, stable conditions that created it.
In contrast, white or opaque ice is a red flag. This ice forms when snow falls on thin ice and freezes in, or when slush on the surface consolidates. It's often filled with air bubbles, which greatly reduce its structural integrity. While it might look thick, its strength can be dramatically less than clear ice. Many experts estimate it can be 50% weaker. So, if your guideline calls for 4 inches of clear ice, you might need 8 inches of white ice to achieve similar safety. Always be extra cautious on white ice, and measure frequently.
The most dangerous types of ice are often grey or honeycombed ice. Grey ice indicates the presence of water, either from thawing conditions or a current beneath. This saturated ice is losing its bond and can be extremely weak. Honeycombed or "candle ice" is typically a sign of late-season thaw, where the ice crystals separate, creating vertical channels. This type of ice is notoriously unpredictable; a seemingly solid sheet can disintegrate underfoot without warning. Even thick honeycombed ice offers little to no reliable support. Knowing the signs of deteriorating ice, especially as we approach warmer weather and as outlined in the New Hampshire Lake Trout Ice Fishing Season Dates, can literally save your life.
Emergency Preparedness: What to Do If the Unthinkable Happens
Despite all precautions, accidents can still occur. Being prepared for an unexpected plunge is just as important as trying to prevent it. Your emergency kit and knowledge of self-rescue techniques are non-negotiable.
First, wear a personal flotation device (PFD) or a float suit. This cannot be stressed enough. A PFD will keep your head above water, even if cold shock or hypothermia begins to affect your muscle control. Many modern ice fishing suits incorporate flotation, providing both warmth and buoyancy. While specific rules like those for open water in the Life Jacket Requirements for New Hampshire Boaters might seem irrelevant on ice, the principle of flotation for safety remains paramount. You can find excellent options for PFDs and float suits on Amazon, designed specifically for cold-weather activities.
Second, always carry ice picks (also known as ice claws) and keep them easily accessible. These are two small, sharp metal spikes connected by a cord, worn around your neck or in an easily reached pocket. If you go through, these picks provide the grip you need to pull yourself out of the water and onto the slick ice. Without them, trying to claw your way out with bare, numb hands is almost impossible. They are inexpensive and incredibly effective life-saving tools.
Finally, know the "STOP, REACH, KICK, ROLL" self-rescue method. If you fall through:
- STOP your forward motion and control your breathing. Don't panic.
- REACH forward onto the solid ice in front of you with your ice picks.
- KICK your feet vigorously to propel yourself onto the ice, using the picks to pull.
- Once your upper body is on the ice, ROLL away from the hole, spreading your weight out, until you are on solid ground. Do not stand up immediately, as this concentrates your weight and could break the ice again.
Once out, get to shelter and dry clothes as quickly as possible. Every second counts in preventing severe hypothermia.
The Buddy System and Constant Vigilance
No matter how experienced you are, never venturing onto the ice alone is a golden rule. The buddy system isn't just for kids; it's a critical safety measure for adults in high-risk environments. A partner can spot danger, help measure ice, and most importantly, initiate a rescue or call for help if you go through. Having someone nearby with a throw rope, a fully charged phone, or even just a long branch can be the difference between a close call and a tragedy. You can also share the weight of lugging out a portable ice shanty, making your trip easier and safer, particularly if you're setting up a more substantial shelter like those discussed in Best Ice Shanty for New Hampshire Lakes.
Before you even leave your driveway, tell someone onshore exactly where you are going and when you expect to return. This "float plan" provides vital information for emergency services if you don't check in on time. Even a quick text to a family member or friend can be a lifesaver. This simple act creates a safety net that can be activated if needed.
Finally, understand that ice conditions are dynamic and can change rapidly. What was safe in the morning might be dangerous by afternoon, especially with changing weather. Always remain vigilant, continuously assess the ice around you, and look for signs of instability like fresh cracks, pressure ridges (where ice sheets have buckled), or sudden changes in ice color. Be willing to pack up and go home if conditions deteriorate, even if the fish are biting. No fish is worth risking your life. For those looking for prime spots, check out the Best Ice Fishing Lakes in New Hampshire, but remember, the best spot is always a safe spot.
Disclaimer
This article is for general informational purposes only and does not constitute professional advice. Laws, prices and regulations vary by location and change over time. Consult a qualified professional for guidance on your specific situation.