Best strike indicator for nymph fishing
When you're out on a New Hampshire trout stream, the subtle art of nymph fishing can be incredibly rewarding, but it often comes with a common frustration: how do you even know if a fish is biting a tiny nymph drifting unseen beneath the surface? Many anglers struggle to detect those incredibly soft takes, leading to missed fish and frustration. This guide is here to demystify the world of strike indicators, helping you choose and use the best options to turn those invisible nibbles into hooked fish, making your nymphing game much more effective and enjoyable on any stream, from the Swift River to the Pemigewasset.
Why Strike Indicators Matter for Nymph Fishing
Nymph fishing is a cornerstone of trout fishing in New Hampshire, especially when trout aren't actively rising to dry flies. Most of a trout's diet consists of aquatic insects in their larval or nymphal stages, drifting near the bottom of rivers and streams. The challenge, however, lies in detecting when a fish actually takes your offering. Unlike aggressive dry fly strikes that create visible splashes, a nymph bite is often incredibly subtle, sometimes just a slight hesitation or twitch.
The Subtlety of a Nymph Bite
Imagine standing in the cold current of the Ellis River, your nymph drifting downstream. Below the surface, a brown trout gently sips your fly. If you're not paying attention or lack a good indicator, that tiny movement might be imperceptible. It's not a violent tug; it's often more like the fly suddenly feeling "heavy," or your line simply hesitates for a split second. Without a clear visual cue, distinguishing a true bite from a nymph ticking a rock or a change in current can feel like guesswork. That's where a quality strike indicator becomes your best friend, acting as an extension of your senses and amplifying those minuscule movements.
These subtle takes are particularly common with wary trout in heavily fished waters or when water temperatures are low, making fish less aggressive. A small brook trout in a high mountain stream, for instance, might only slightly mouth a nymph before spitting it out if it feels any resistance. Your strike indicator is the silent alarm, signaling even the slightest curiosity from a fish, allowing you to react quickly and set the hook before the trout realizes its mistake. It transforms what would be an invisible event into a noticeable twitch, drift alteration, or sudden dip, empowering you to connect with more fish.
Reading the Drift and Depth
Beyond detecting bites, strike indicators are crucial tools for managing your nymph's drift and depth. To effectively present a nymph, it needs to tumble naturally with the current, mimicking a real insect. This "dead drift" is paramount. A good indicator, properly positioned and buoyant, helps you monitor this drift. If your indicator is dragging or skating across the surface faster or slower than the surrounding current, you know your nymph isn't drifting naturally, which immediately signals a less effective presentation.
Furthermore, the indicator's position on your leader helps you control the depth of your nymph. By adjusting how far up or down the leader your indicator sits, you can target specific depths where trout are feeding. Are they holding in a shallow riffle or a deep pool? Moving your indicator up or down a few inches can be the difference between your nymph bumping along the bottom where the fish are, or sailing harmlessly over their heads. Understanding how to use your indicator to read the current and adjust depth is fundamental to effective nymph fishing, ensuring your fly is always presented in the most productive zone. When you're fishing a deep run on the Connecticut River, for example, setting your indicator further up your leader allows your nymphs ample time to sink into the strike zone. Conversely, in shallower, faster pocket water, you might place it closer to your flies.
Types of Strike Indicators for Nymph Fishing in New Hampshire
The world of strike indicators is surprisingly diverse, each type offering distinct advantages depending on the fishing situation you find yourself in. From tiny mountain streams to larger, more open rivers, having a few different styles in your kit can make a huge difference. You can find most of these options at local fly shops, or easily order them from online retailers like Amazon or Bass Pro Shops.
Foam Indicators Attachable
These are arguably the most common and widely used strike indicators, and for good reason. They are typically made from buoyant foam and attach to your leader using a variety of mechanisms, such as O-rings, rubber bands, or a spring-loaded clamp. Their primary appeal is their versatility and ease of use. They come in various sizes and colors, allowing you to match the indicator to the weight of your nymphs and the visibility conditions. A bright orange or yellow foam indicator is highly visible even in choppy water or low light, making it easier to track your drift.
For instance, if you're fishing a medium-sized river like the Merrimack, where you might be using two nymphs and a split shot, a larger foam indicator will provide enough buoyancy to keep everything afloat and visible. Many designs are easily adjustable up and down the leader, which is crucial for changing fishing depths quickly. However, some attachment methods can kink or damage delicate leaders if not applied carefully. When you're using light tippet, like a Best tippet material for tiny mountain stream trout, you'll want an indicator that won't compromise your line strength.
Yarn Indicators
Yarn indicators offer a different approach, prized for their sensitivity and soft landing on the water. They are typically made from buoyant, water-resistant yarn, often treated with floatant. The main advantage of yarn is its minimal resistance; when a trout takes the nymph, the yarn dips or moves without creating much drag, providing a very subtle, yet clear, strike indication. They are also very lightweight, making them ideal for delicate presentations where you don't want to spook fish with a splashy indicator.
Yarn indicators are generally attached to the leader with a small piece of rubber band or by twisting the leader through the yarn itself. They can be a bit more finicky to adjust than foam indicators, sometimes requiring you to re-tie or re-loop the yarn. However, their sensitivity shines through, particularly when fishing clear, calm pools or when targeting educated trout that are prone to spitting flies quickly. Applying a good quality floatant is key to keeping them riding high on the water, especially after repeated casts or in rainy conditions.
Slinky/Tubing Indicators
Slinky or tubing indicators are a less common but highly effective option, particularly for discerning anglers who value maximum sensitivity and adjustability. These indicators often consist of a thin, flexible plastic tubing or a coiled "slinky" material that slips onto your leader. The leader passes through the indicator, allowing it to slide freely. Once positioned, you use a toothpick or a small rubber O-ring to wedge it in place, fixing it at your desired depth.
Their main benefit is that they create virtually no memory or kinks in your leader, and their streamlined shape cuts through the wind well. They are also incredibly sensitive, as the take is transmitted directly through the leader. While they can be a bit trickier to rig initially, their low profile and excellent sensitivity make them a favorite for technical nymphing situations where fish are particularly wary. Think about when you're fishing catch-and-release only waters or New Hampshire catch and release only trout streams; every advantage counts.
Thingamabobbers and Air-Locks
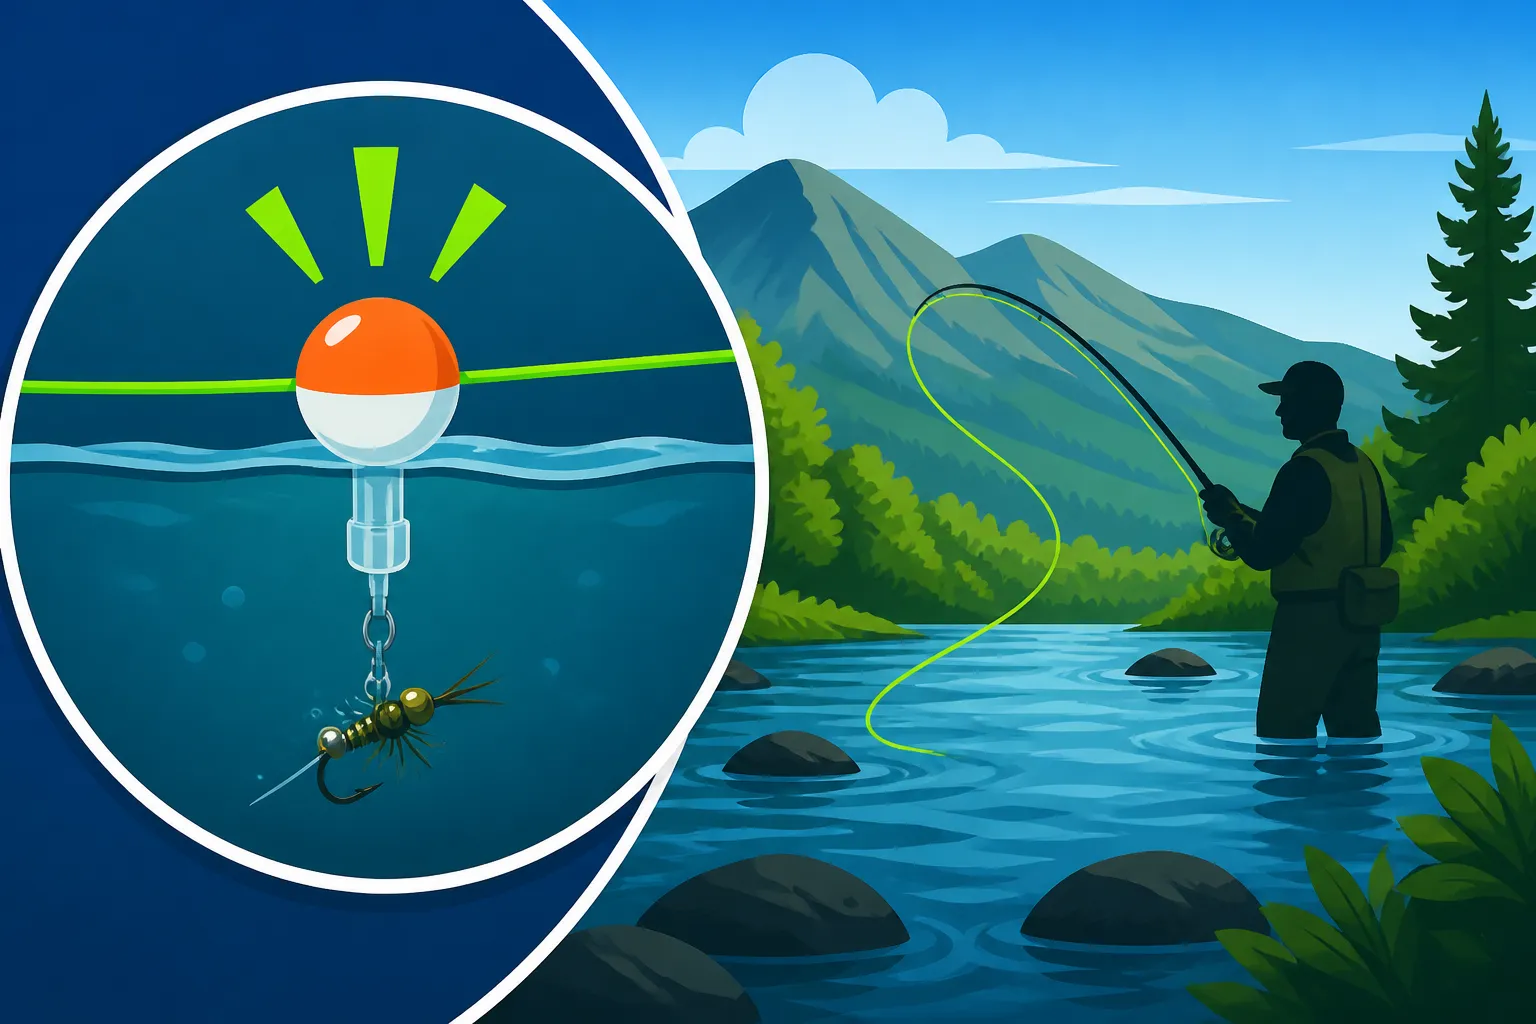
These are specific brands and designs that have become incredibly popular, essentially falling under the "attachable foam" category but with unique attachment systems. Thingamabobbers are perfectly spherical foam balls that attach to your leader via a loop-to-loop connection or by threading the leader through a small plastic sleeve and locking it with a rubber O-ring. They are exceptionally buoyant and highly visible due to their bright colors and round shape.
Air-Lock indicators, on the other hand, utilize a small nut and bolt system. You slide your leader into a groove on one half of the foam indicator, then screw on the other half (the "nut"). This creates a very secure, non-slip attachment that is also gentle on your leader. Both Thingamabobbers and Air-Locks are excellent choices for most nymphing situations, offering strong buoyancy, great visibility, and relative ease of adjustment. They're staples in many anglers' vests and can be found readily at most fly fishing retailers, including larger stores like Bass Pro Shops.
Integrated Leader Systems (Euro Nymphing, Sighter Material)
This method moves away from a traditional buoyant indicator and integrates the "strike detection" directly into your leader system. It's the hallmark of Euro nymphing (or contact nymphing) and is gaining significant traction for its unparalleled sensitivity and direct contact with the flies. Instead of a floating indicator, a section of brightly colored monofilament or fluorocarbon — known as a "sighter" — is tied into the middle or end of a specialized leader. This sighter is often multi-colored (e.g., alternating pink and chartreuse) to maximize visibility against different backgrounds.
When a fish takes the nymph, the sighter material will twitch, stop, or move unnaturally. Because there's no buoyant bobber interfering with the drift, the connection to the flies is direct and immediate. This system excels in faster, more turbulent water where a traditional bobber might be pulled under by currents, or in situations where extreme sensitivity is required. While requiring a bit more specialized rigging and technique, mastering Euro Nymphing New Hampshire Trout Streams can unlock a whole new level of nymph fishing effectiveness, especially for detecting those barely-there takes from picky trout.
Choosing the Right Indicator for Your New Hampshire Nymphing Situation
Selecting the perfect strike indicator isn't a one-size-fits-all decision. The best indicator for you will depend on a combination of environmental factors, the specific techniques you're employing, and even your personal preferences. It's about finding the balance between buoyancy, sensitivity, and visibility to maximize your chances of success on the water.
Matching Indicator to Water Conditions
The characteristics of the water you're fishing heavily influence indicator choice. For wide, turbulent rivers with strong currents, like sections of the Androscoggin or even the larger stretches of the Pemigewasset, you'll need a highly buoyant and visible indicator. Large foam indicators, Thingamabobbers, or Air-Locks are excellent choices here. Their size and bright colors help them stay afloat and visible amidst the chaotic surface, allowing you to track your drift effectively. Imagine trying to see a tiny yarn indicator in a frothing run – it would be almost impossible!
Conversely, in slow-moving, clear, or shallow waters, such as many of the smaller Best Fly Fishing Rivers in New Hampshire or calm pools, a more subtle and sensitive indicator is preferable. Here, yarn indicators or smaller foam options excel. They make less splash when they land and provide minimal resistance, which can be crucial for not spooking wary trout. In extremely clear water or highly pressured areas, an integrated sighter system for Euro nymphing might be the most effective, as it offers the least intrusive presentation possible. Consider the visibility from your vantage point as well; if you're fishing from an elevated bank, you might be able to get away with a smaller indicator than if you're down low and close to the water.
Considering Nymph Weight and Depth
The weight of your nymph rig and the depth you need to fish are critical factors. A heavy nymph or a multi-nymph rig with added split shot requires an indicator with sufficient buoyancy to keep it from sinking, but without creating excessive drag. If your indicator is too small for the weight you're fishing, it will frequently submerge, leading to false alarms and difficulty in distinguishing bites from simply sinking. For heavier setups, a larger foam indicator or a Thingamabobber is typically the best bet.
When fishing deep pools or runs, like those found in the lower sections of the Merrimack River, you'll need to set your indicator high on your leader, sometimes several feet above your flies, to allow them enough time to sink to the desired depth. Ensure the indicator you choose can be easily adjusted and securely held in place at that distance without slipping. Conversely, when fishing shallow riffles, you'll place the indicator much closer to your flies. Best nymph pattern for high water conditions might dictate a heavier rig, requiring more buoyancy from your indicator.
Personal Preference and Visibility
Ultimately, personal preference plays a significant role. Some anglers simply prefer the feel and look of one indicator type over another. Visibility is another huge factor, and this can change dramatically depending on light conditions, water clarity, and even your own eyesight. What's perfectly visible to one angler might be a struggle for another. Experiment with different colors – bright orange, chartreuse, pink, or even white can all be effective depending on the background and light.
For example, on a bright, sunny day with a clear blue sky, a dark-colored indicator might be hard to see against shadows or reflections. Conversely, on an overcast day or in the fading light of dusk, a bright, fluorescent color will stand out. If you find yourself squinting or struggling to track your drift, it's a clear sign that your indicator choice isn't working for you. Don't be afraid to switch it up! Many anglers carry a selection of different indicator types and colors to adapt to the changing conditions of a day on the water. A good Best Gear for New Hampshire Trout Fishing setup will include a variety.
Tips for Rigging and Fishing with Strike Indicators
Having the right strike indicator is only half the battle; knowing how to properly rig it and effectively fish with it is where you truly unlock its potential. Mastering these techniques will lead to more hookups and a deeper understanding of the underwater world you're fishing.
Proper Placement on Your Leader
The placement of your strike indicator on your leader is perhaps the most crucial rigging decision you'll make. A general rule of thumb is to set your indicator at least 1.5 times the depth of the water you're fishing. So, if you're fishing a 3-foot deep run, your indicator should be about 4.5 feet above your lead fly. This allows your nymph enough time and distance to sink into the strike zone and drift naturally near the bottom, where most trout feed. If you're using a Best Nymph Rig for High Mountain Streams, adjust this distance based on current and depth.
However, this is just a starting point. Experiment! In faster water, you might need to place it a bit closer to your flies to ensure they get down quickly. In slower, deeper pools, you might increase the distance. Always err on the side of having your flies too deep rather than too shallow. If your flies are constantly snagging on the bottom, move your indicator up a few inches. If you're not getting any bites and suspect your flies aren't getting deep enough, slide it down. Proper placement ensures your flies are in front of the fish's face, not just dragging above it. When you're learning Wading Techniques for New Hampshire Trout Streams, keep an eye on how the indicator is affecting your cast and drift.
Achieving a Natural Drift
The "dead drift" is the holy grail of nymph fishing. Your strike indicator is your primary tool for monitoring this. When your nymph is drifting naturally, your indicator should move at the same speed as the surrounding surface currents, without dragging, accelerating, or stopping unnaturally. Any deviation from this smooth, unhindered movement signals a problem or, hopefully, a bite!
To achieve a good drift, you'll often need to "mend" your line. Mending involves repositioning your fly line on the water upstream of your indicator to eliminate drag. If your indicator starts pulling faster than the current, your line is dragging on the surface downstream. A quick upstream mend, flipping a loop of line onto the water, will allow your indicator and flies to continue drifting freely. Similarly, if your indicator is slowing down, it might mean your line is bowing in the current downstream, creating drag. Continuous mending, often subtle and intuitive, is what truly separates effective nymph anglers from those just casting and hoping. For more on this, check out Fly Fishing for Trout in New Hampshire.
Detecting the Softest Takes
This is where all your efforts culminate. Your strike indicator is there to signal the bite, often a tiny, fleeting moment. Don't wait for a dramatic pull-under like a bobber fishing for sunfish. Many nymph takes are incredibly subtle:
- The Hesitation: Your indicator stops or pauses unnaturally in the current for a split second.
- The Subtle Dip: It dips slightly or bobs down a fraction of an inch.
- The Lateral Movement: It moves sideways against the current or in an unusual direction.
- The Acceleration: It suddenly speeds up, often because a fish picked up the nymph and is moving with the current.
Any of these "irregularities" in the drift should prompt an immediate and firm (but not violent) hook set. You're not trying to yank the fish out of the water; you're simply trying to set the small hook. A quick, upward sweep of the rod tip is usually sufficient. It's often better to set the hook on a suspected bite and be wrong, than to miss a true take because you hesitated. Over time, you'll develop an intuition for what constitutes a legitimate strike, but your indicator is the teacher. This skill is vital when fishing for pressured trout in popular spots like the Swift River Trout Fishing or the Pemigewasset River Fishing Guide.
Here's a quick comparison of popular strike indicator types:
| Indicator Type | Key Features | Pros | Cons | Ideal Use Case |
|---|---|---|---|---|
| Foam (Attachable) | Various sizes, bright colors, O-ring or clamp attachment | Highly visible, good buoyancy, easy to adjust (most types) | Can create leader memory, splashy on cast (larger sizes) | General nymphing, moderate to heavy rigs, varied waters |
| Yarn | Lightweight, made of buoyant yarn, often treated | Highly sensitive, soft landing, minimal drag | Requires floatant, less visible in rough water, harder to adjust | Calm, clear water, spooky fish, delicate presentations |
| Thingamabobber/Air-Lock | Spherical foam, secure attachment (loop-to-loop or nut/bolt) | Very buoyant, highly visible, secure, less leader damage | Can be bulky, some attachment methods are tricky (Thingamabobber) | All-around nymphing, heavier rigs, good visibility needed |
| Slinky/Tubing | Thin, flexible tubing, leader threads through | Extremely sensitive, no leader damage, casts well | Fiddly to rig/adjust, less buoyant, not as visible | Technical nymphing, clear water, wary fish |
| Sighter (Euro Nymphing) | Colored monofilament integrated into leader | Ultimate sensitivity, direct contact, no drag | Requires specialized leader/technique, low visibility in chop | Extreme sensitivity, fast/turbulent water, contact nymphing |
Mastering the use of strike indicators will elevate your nymph fishing game significantly, allowing you to connect with more of those elusive New Hampshire trout. Remember, practice makes perfect, so get out on the water and start experimenting!
Disclaimer
This article is for general informational purposes only and does not constitute professional advice. Laws, prices and regulations vary by location and change over time. Consult a qualified professional for guidance on your specific situation.